Overview
Creating a new collection helps you organize your items efficiently on your dashboard. This feature is perfect for users who want to categorize their files for easy access and management.
Steps
-
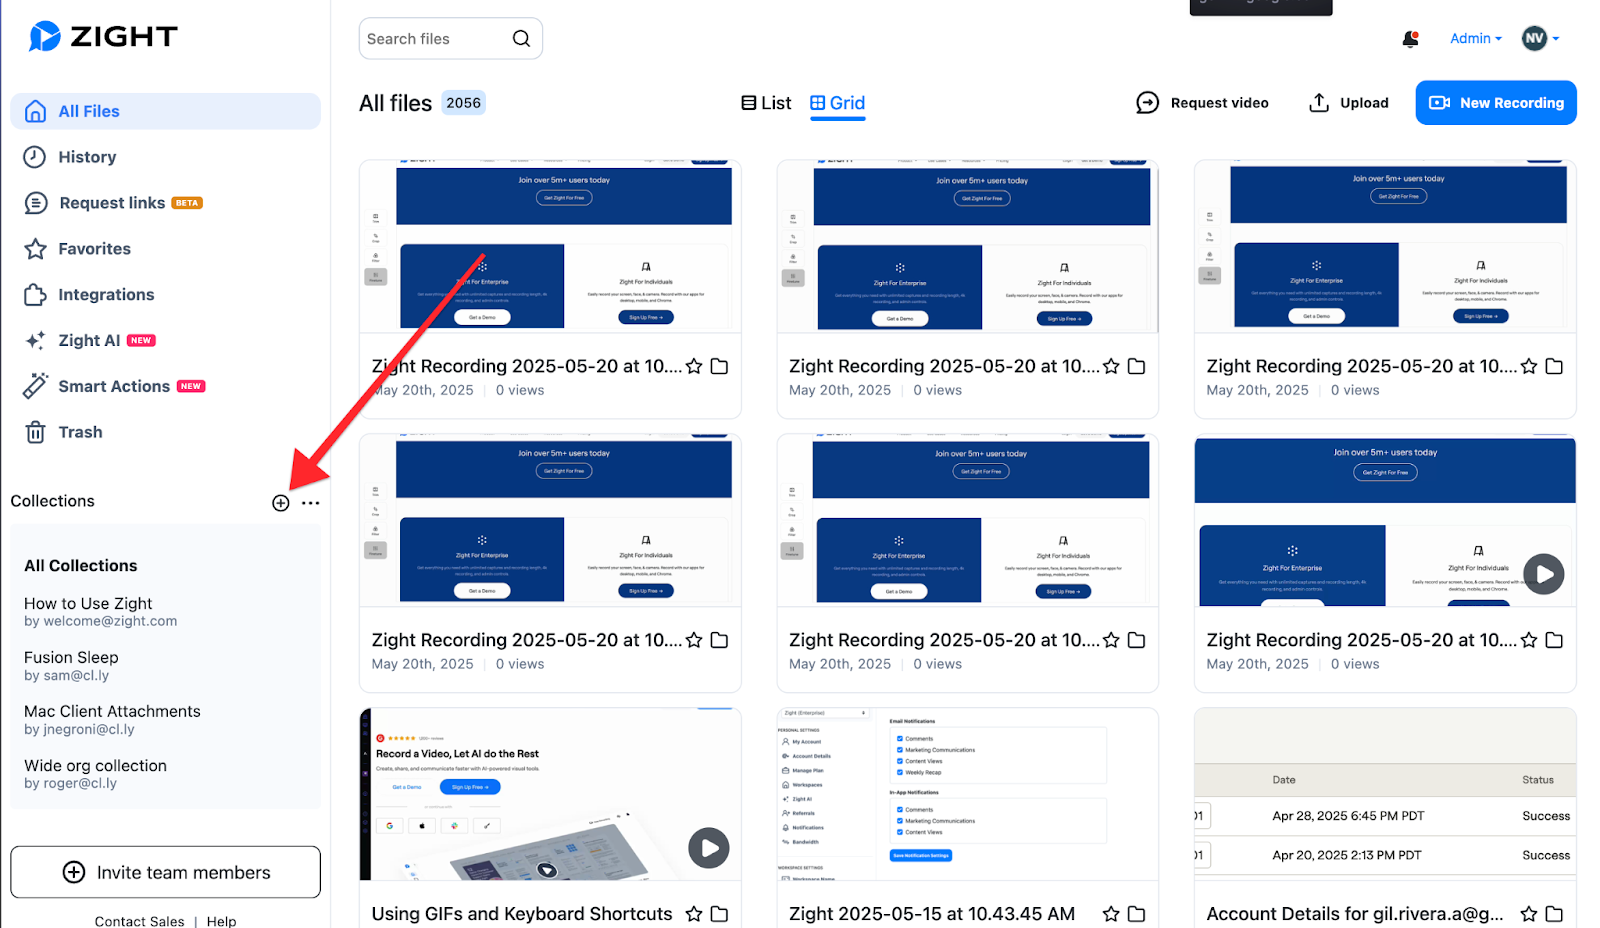
Locate the Left Menu
Find the Left Menu on your dashboard. This is where you will begin the process of creating a new collection.
-
Find the Plus Button
Click the plus button (+) located within the left menu to initiate the creation of a new folder.
-
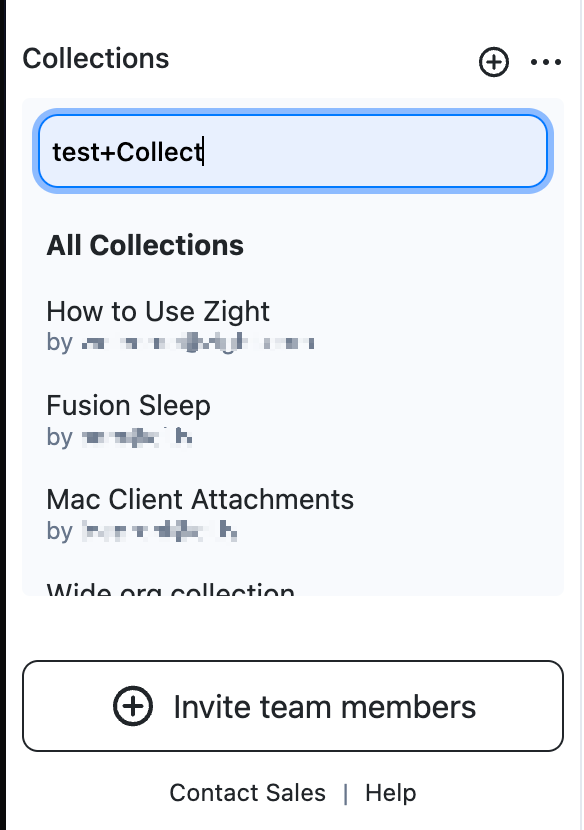
Name Your Folder
Enter a name for your new folder in the dialog text field that appears. This helps in identifying your collection easily.
-
Confirm Creation
Press Enter to finalize the creation of your new folder. It will now appear in your dashboard, ready for you to add items.
-
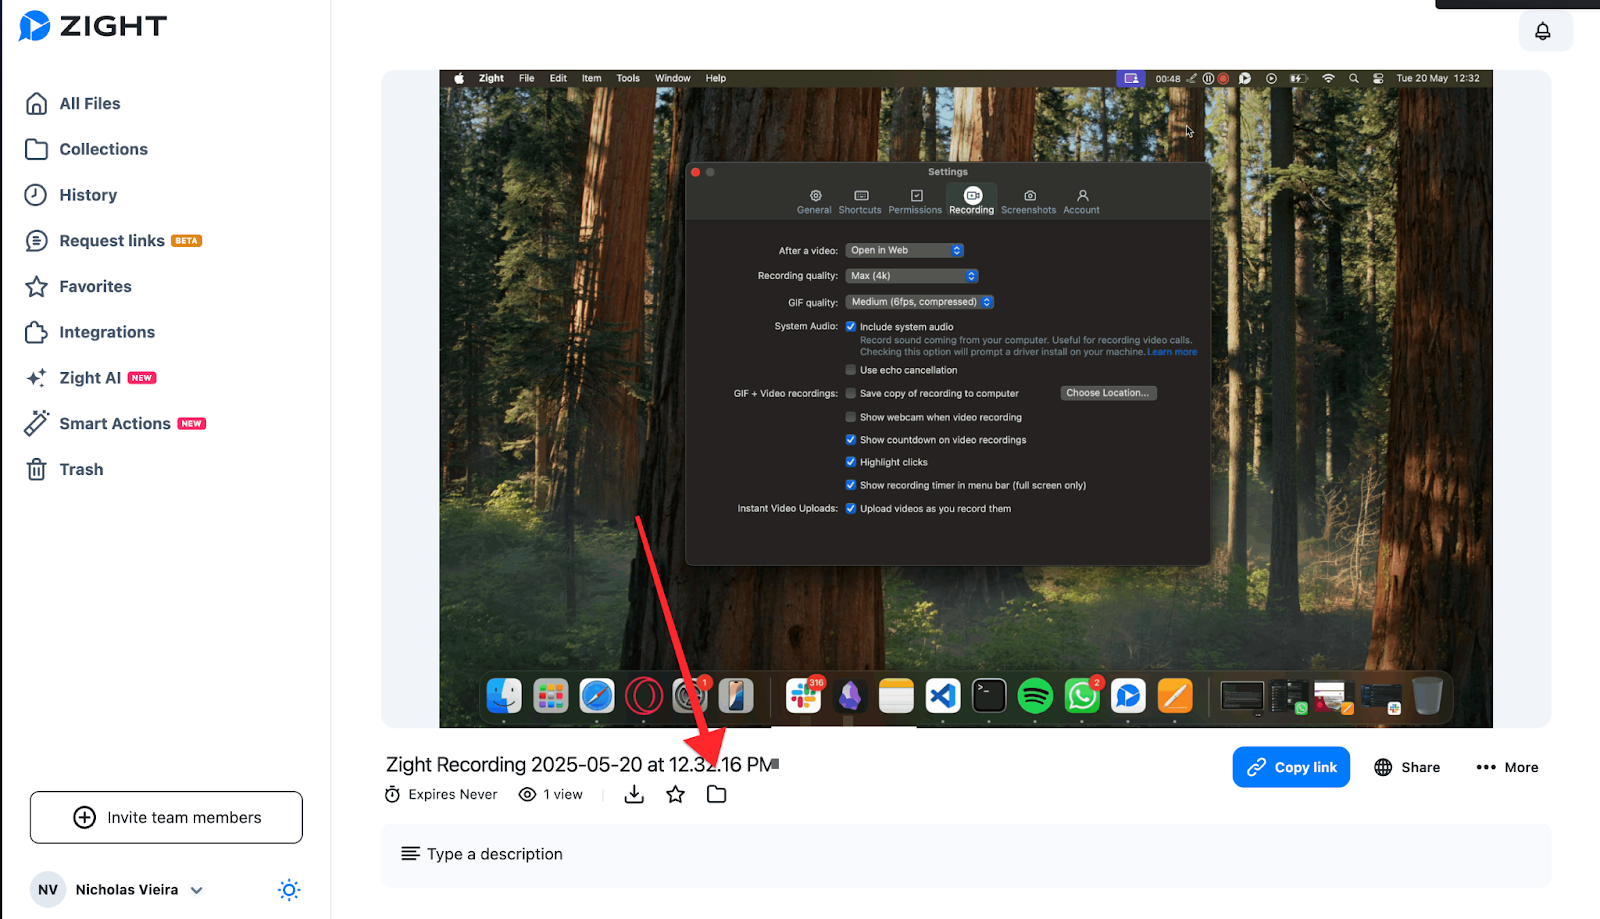
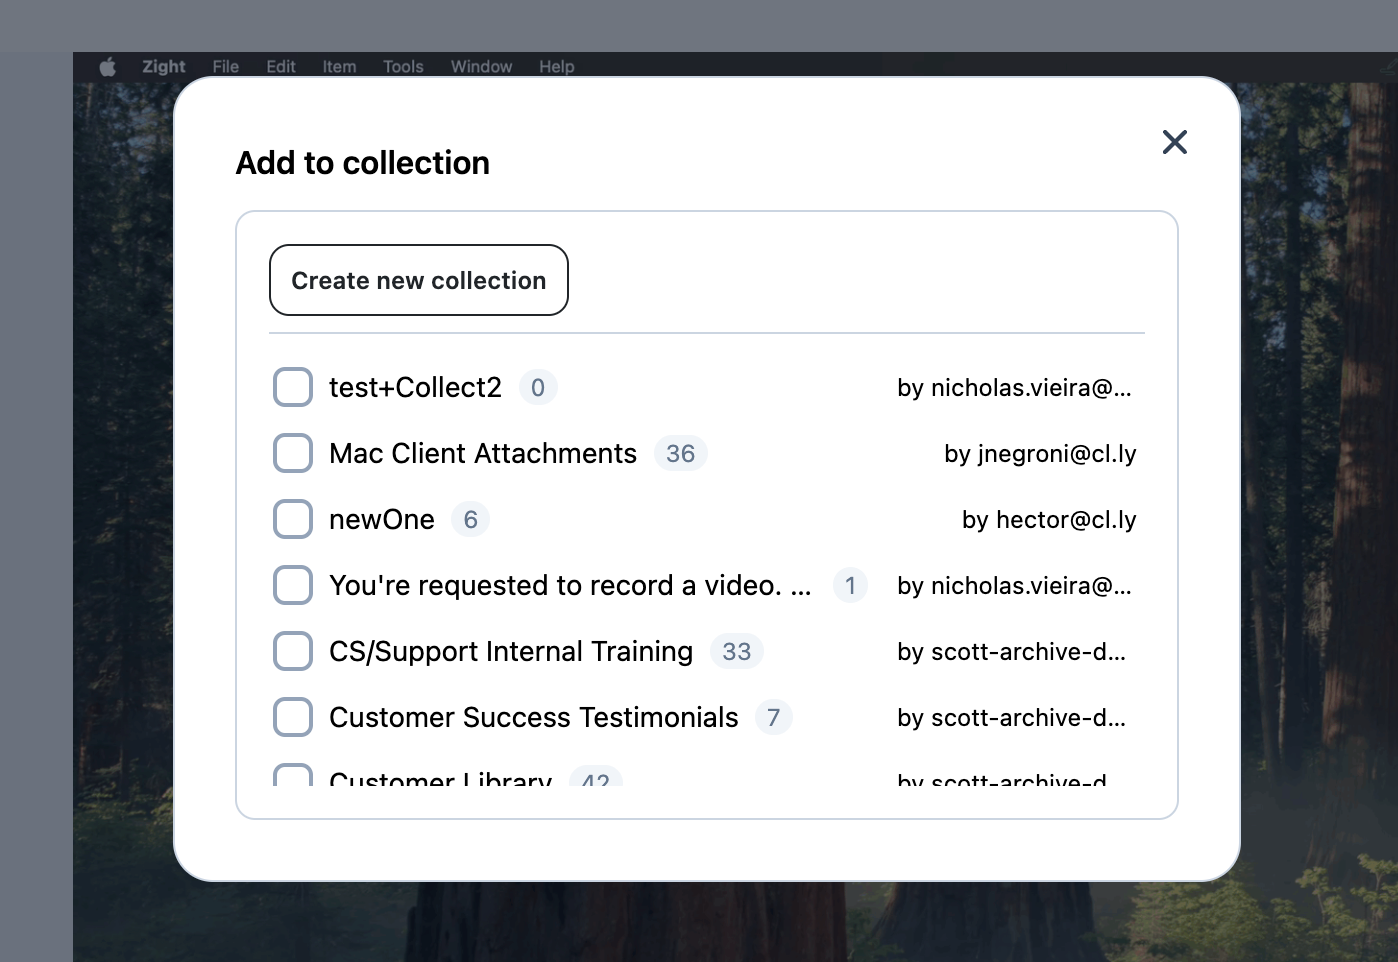
Add Items to Collection
Select the item you wish to add, then click the folder icon. Choose the collection to place your item in.
Then select the collection you want to add the item!
Tips & Best Practices
- Keep your collection names clear and descriptive for easy identification.
- Regularly update and clean up collections to maintain organization.
Troubleshooting
- Unable to find the plus button → Ensure you are on the correct dashboard screen and the left menu is visible.
- Collection not appearing after creation → Refresh the dashboard to update the view.
If you need further assistance or have additional questions, we’d be happy to help! Please contact our support team here.
Comments
0 comments
Please sign in to leave a comment.