SEO review draft — do not publish directly.
This draft copies the live OneLogin article and updates the broken legacy SCIM URL to the current Zight SCIM connector base URL. If approved, apply the same body change to the existing live article ID 5839823662103 rather than publishing this duplicate draft.
This draft copies the live OneLogin article and updates the broken legacy SCIM URL to the current Zight SCIM connector base URL. If approved, apply the same body change to the existing live article ID 5839823662103 rather than publishing this duplicate draft.
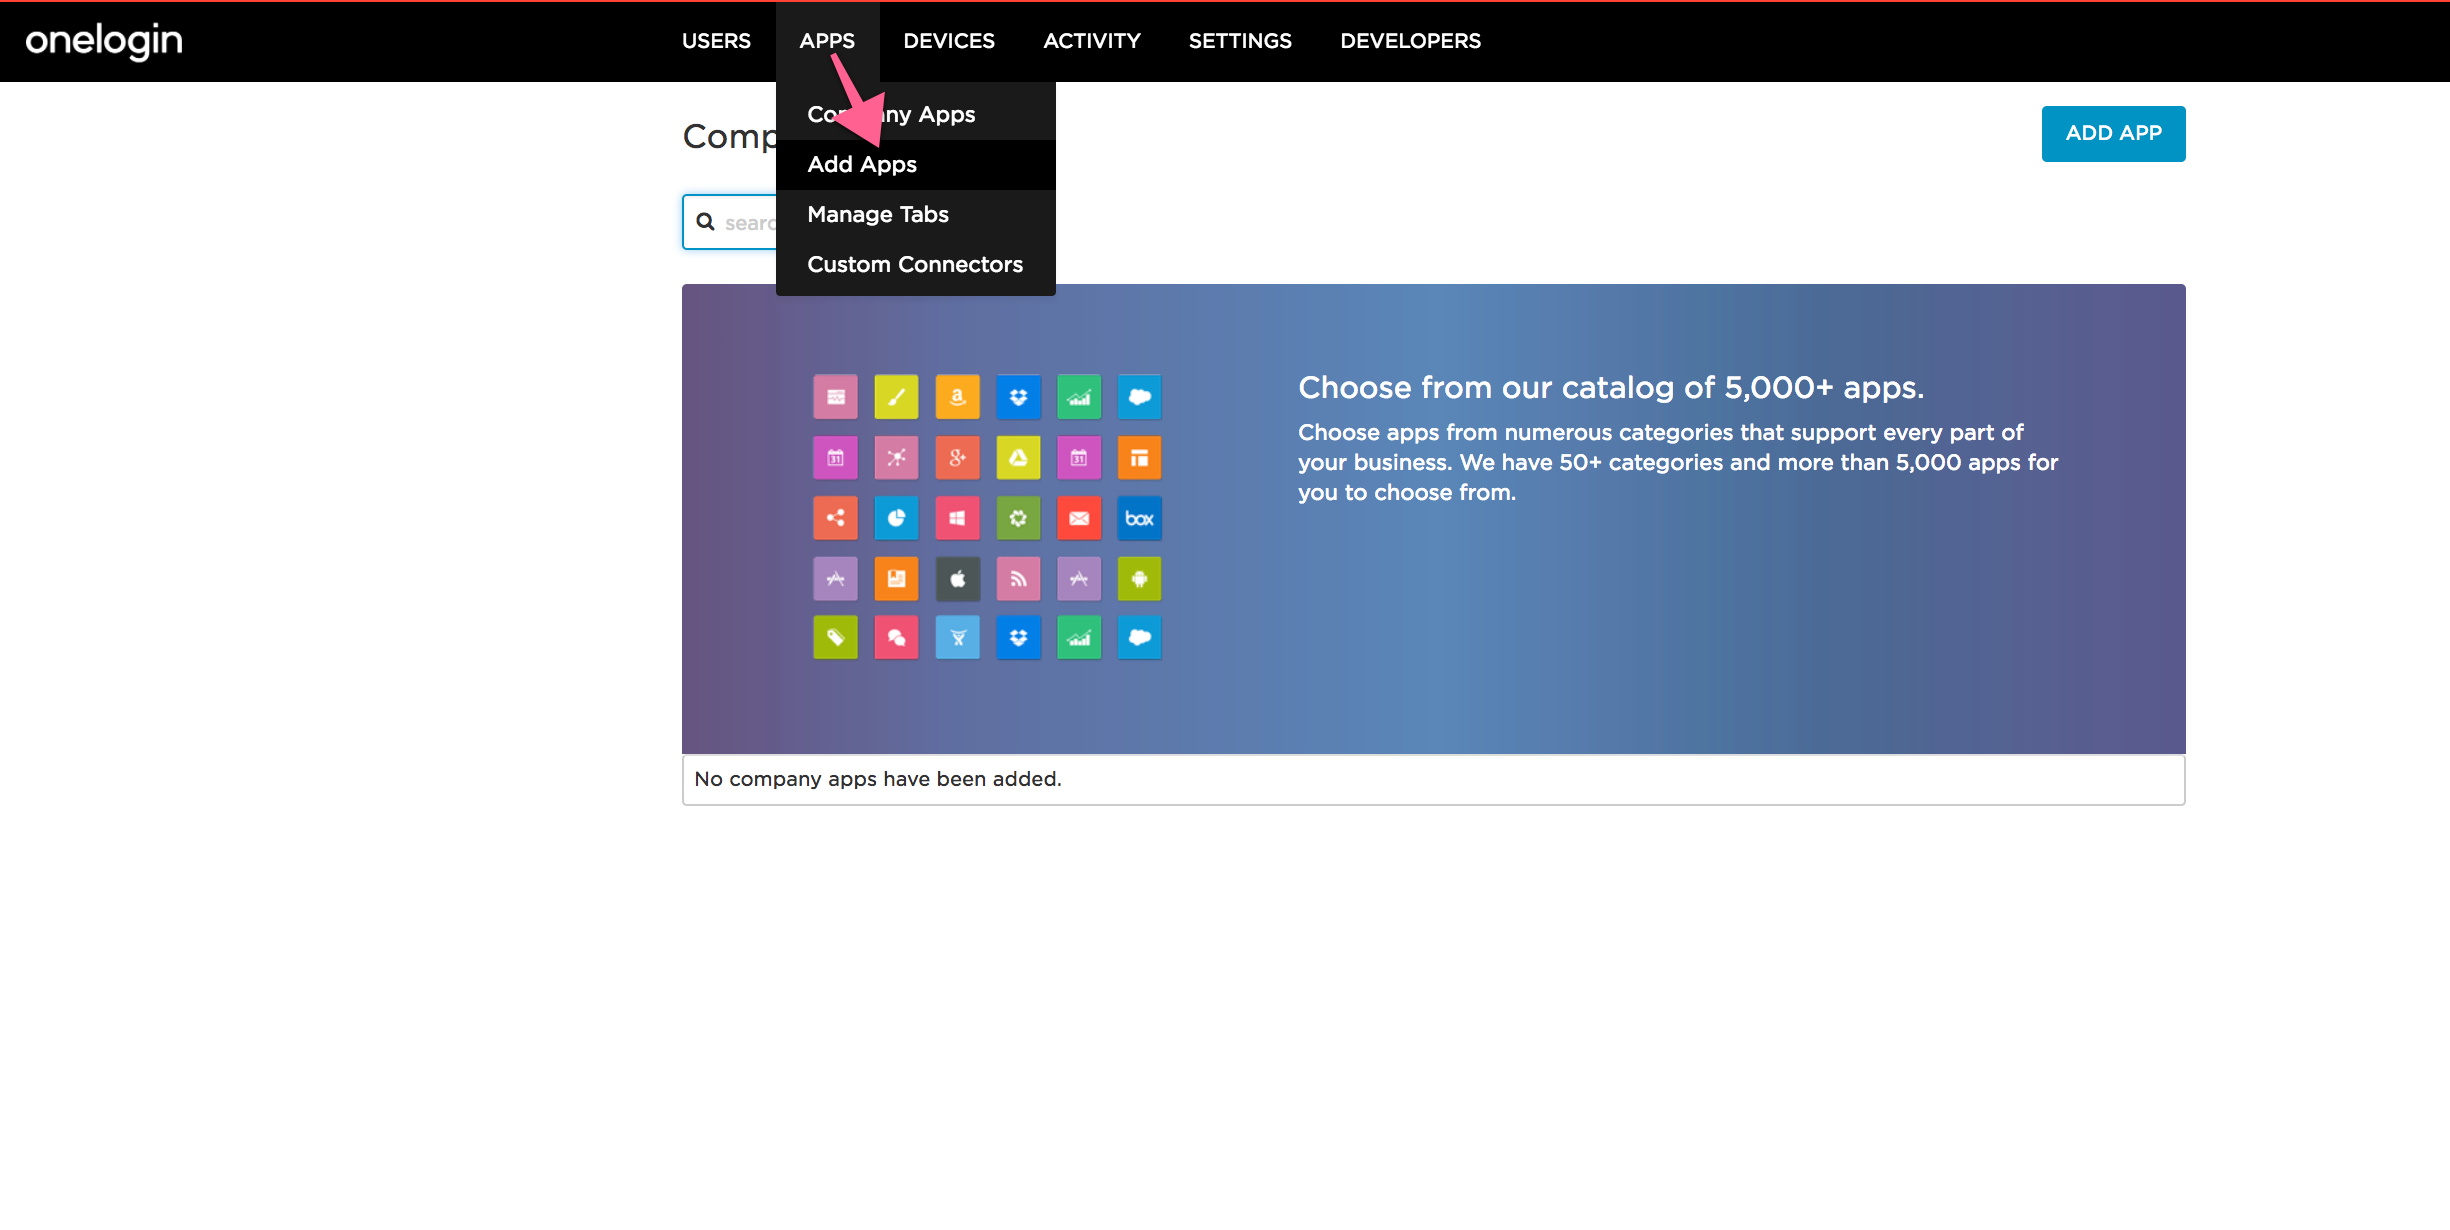
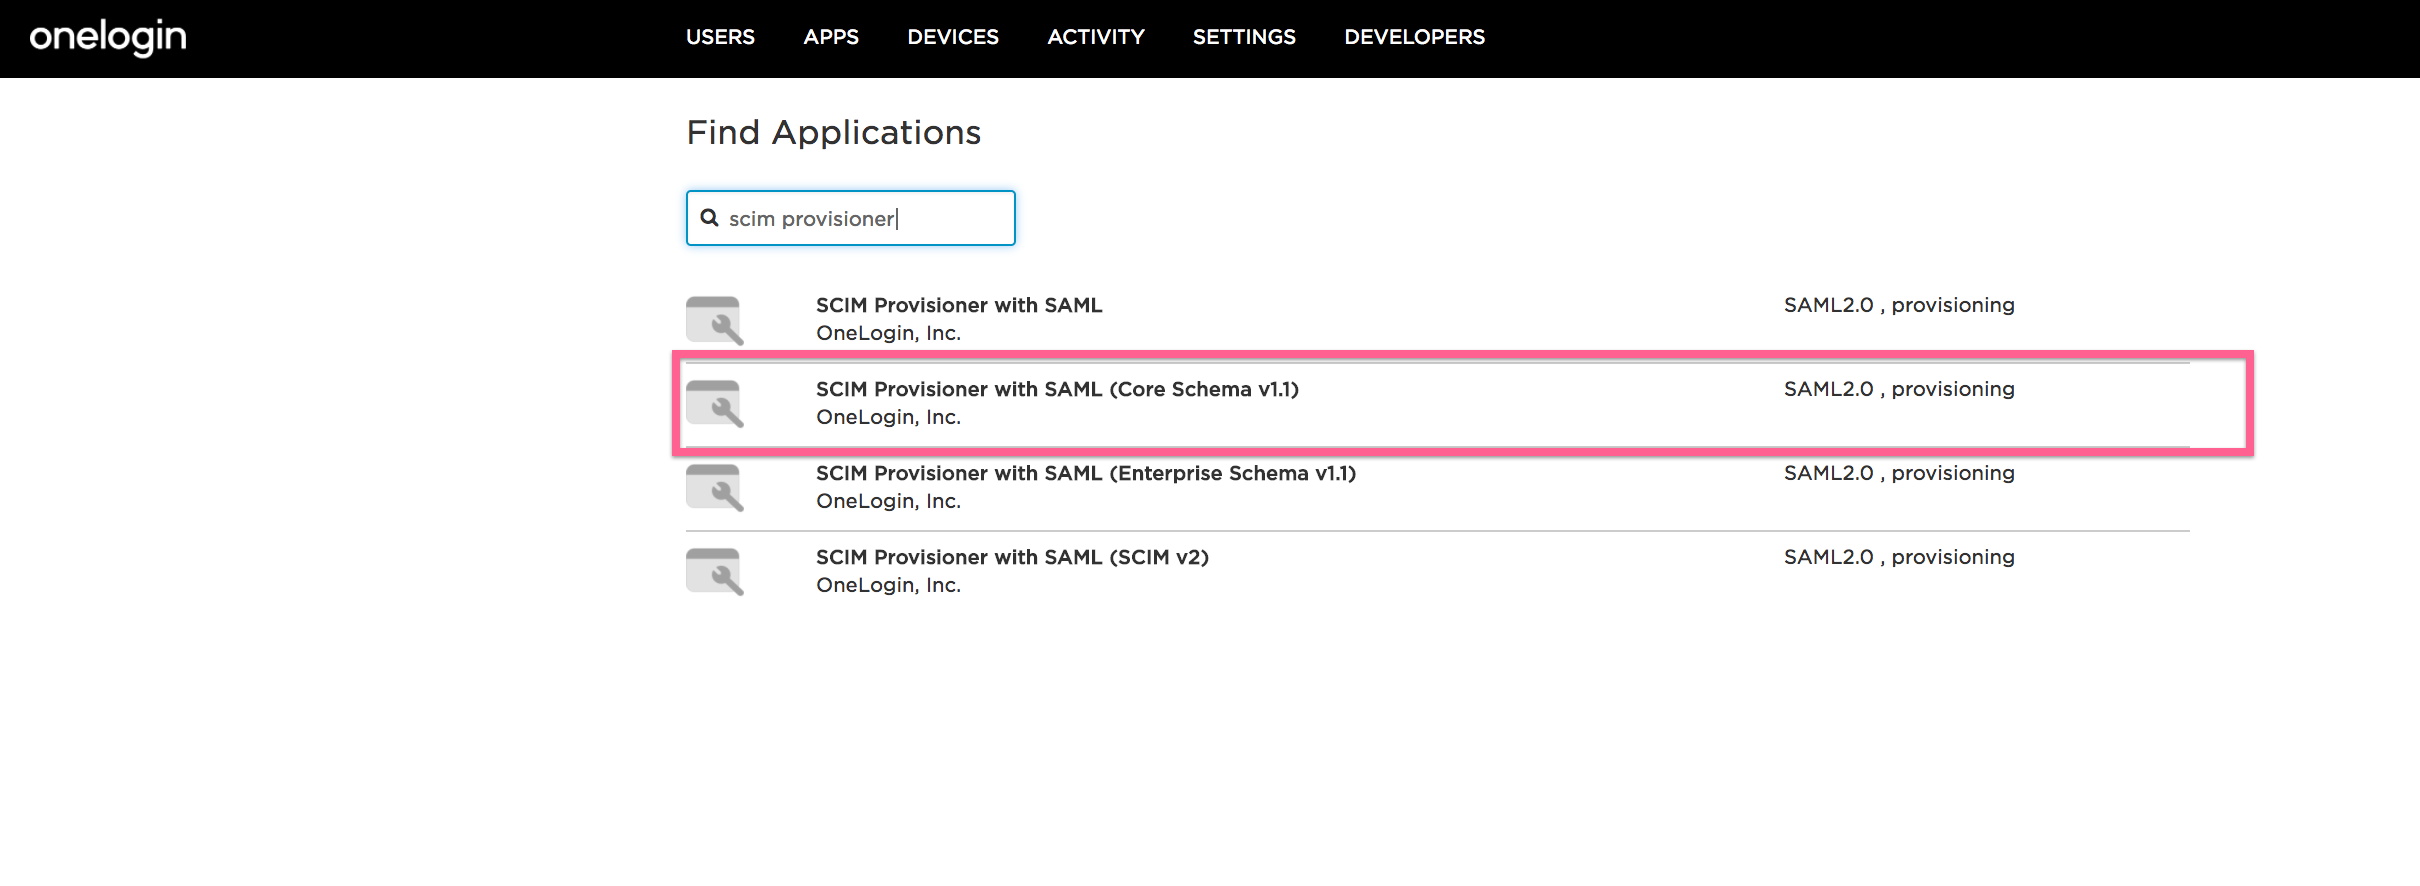
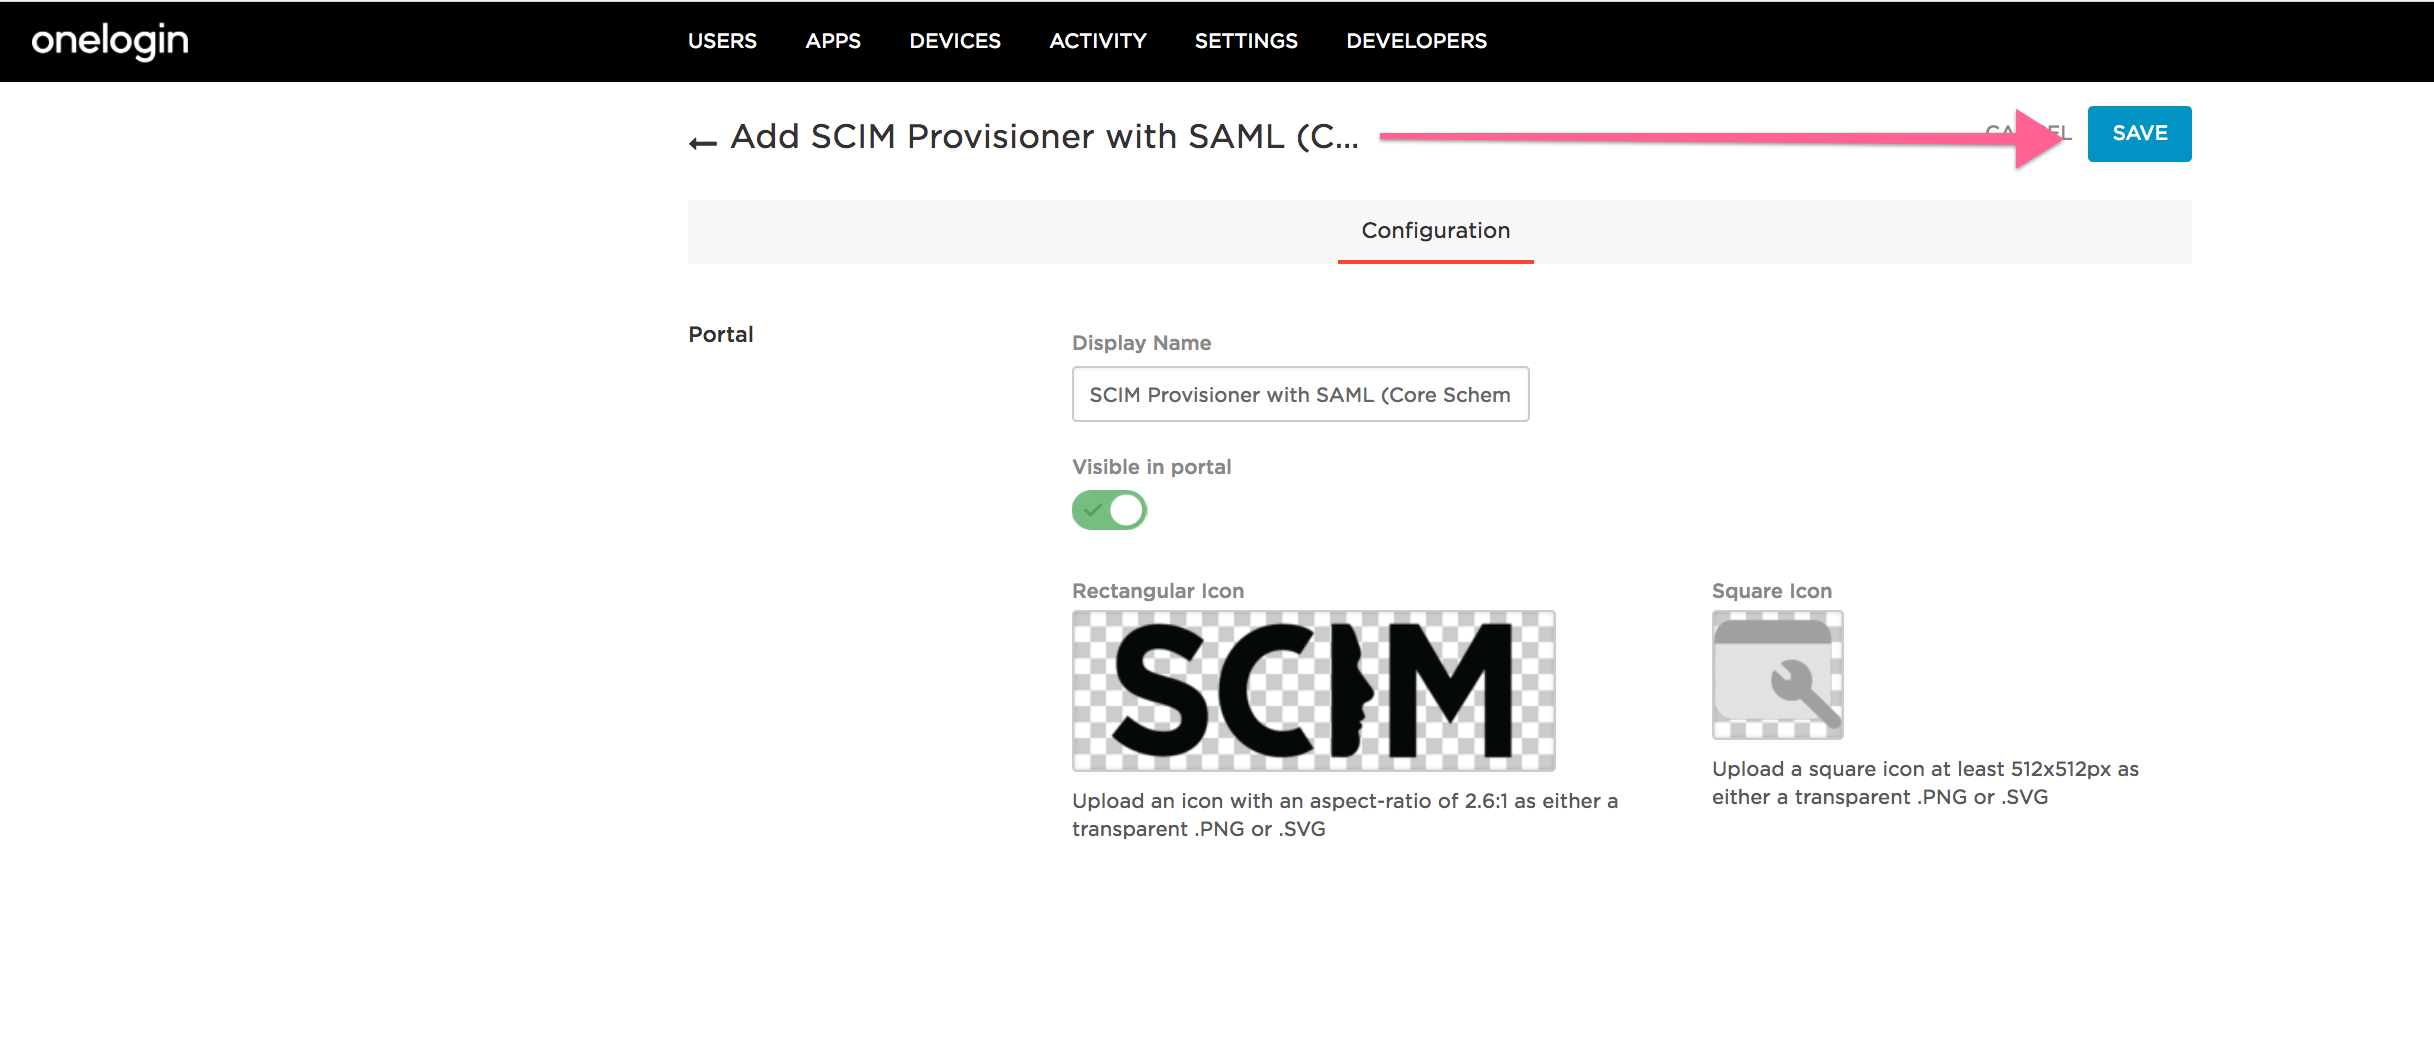
1. Sign into your OneLogin account, go to Apps > Add Apps, add SCIM Provisioner with SAML (Core Schema v1.1) and press Save.
2. Go to SSO tab and send us your X.509 Certificate, SLO URL and SSO URL to our support team so we can validate your app in our database. This is an important part of the process for us to conclude setting it up on our end.

3. Once we're done with setting things up on our end, we will send you the following information:
- SAML Audience URL
- SAML Consumer URL
- SCIM Base URL: https://share.zight.com/saml/scim/v2
- SCIM JSON Template:
{
"schemas": [
"urn:scim:schemas:core:1.0"
],
"email": "{$parameters.scimusername}",
"details": {
"first_name": "{$user.lastname}",
"last_name": "{$user.firstname}"
}
}
"schemas": [
"urn:scim:schemas:core:1.0"
],
"email": "{$parameters.scimusername}",
"details": {
"first_name": "{$user.lastname}",
"last_name": "{$user.firstname}"
}
}
- SCIM Bearer Token
Enter these details in Configuration tab, change API status to Enabled and press Save.

4. You will be able to sign-in using the SAML 2.0 Endpoint in Zight desktop app or SAML app in Onelogin dashboard.
Comments
0 comments
Please sign in to leave a comment.