Overview
This guide is designed for users who want to integrate Google SSO and SAML with Zight, enhancing security and simplifying user management. These features are ideal for organizations using Google Workspace to streamline user provisioning and authentication.
Steps
-
Sign in with Google
Click the Sign in with Google button. This feature is available for all users at no cost.
-
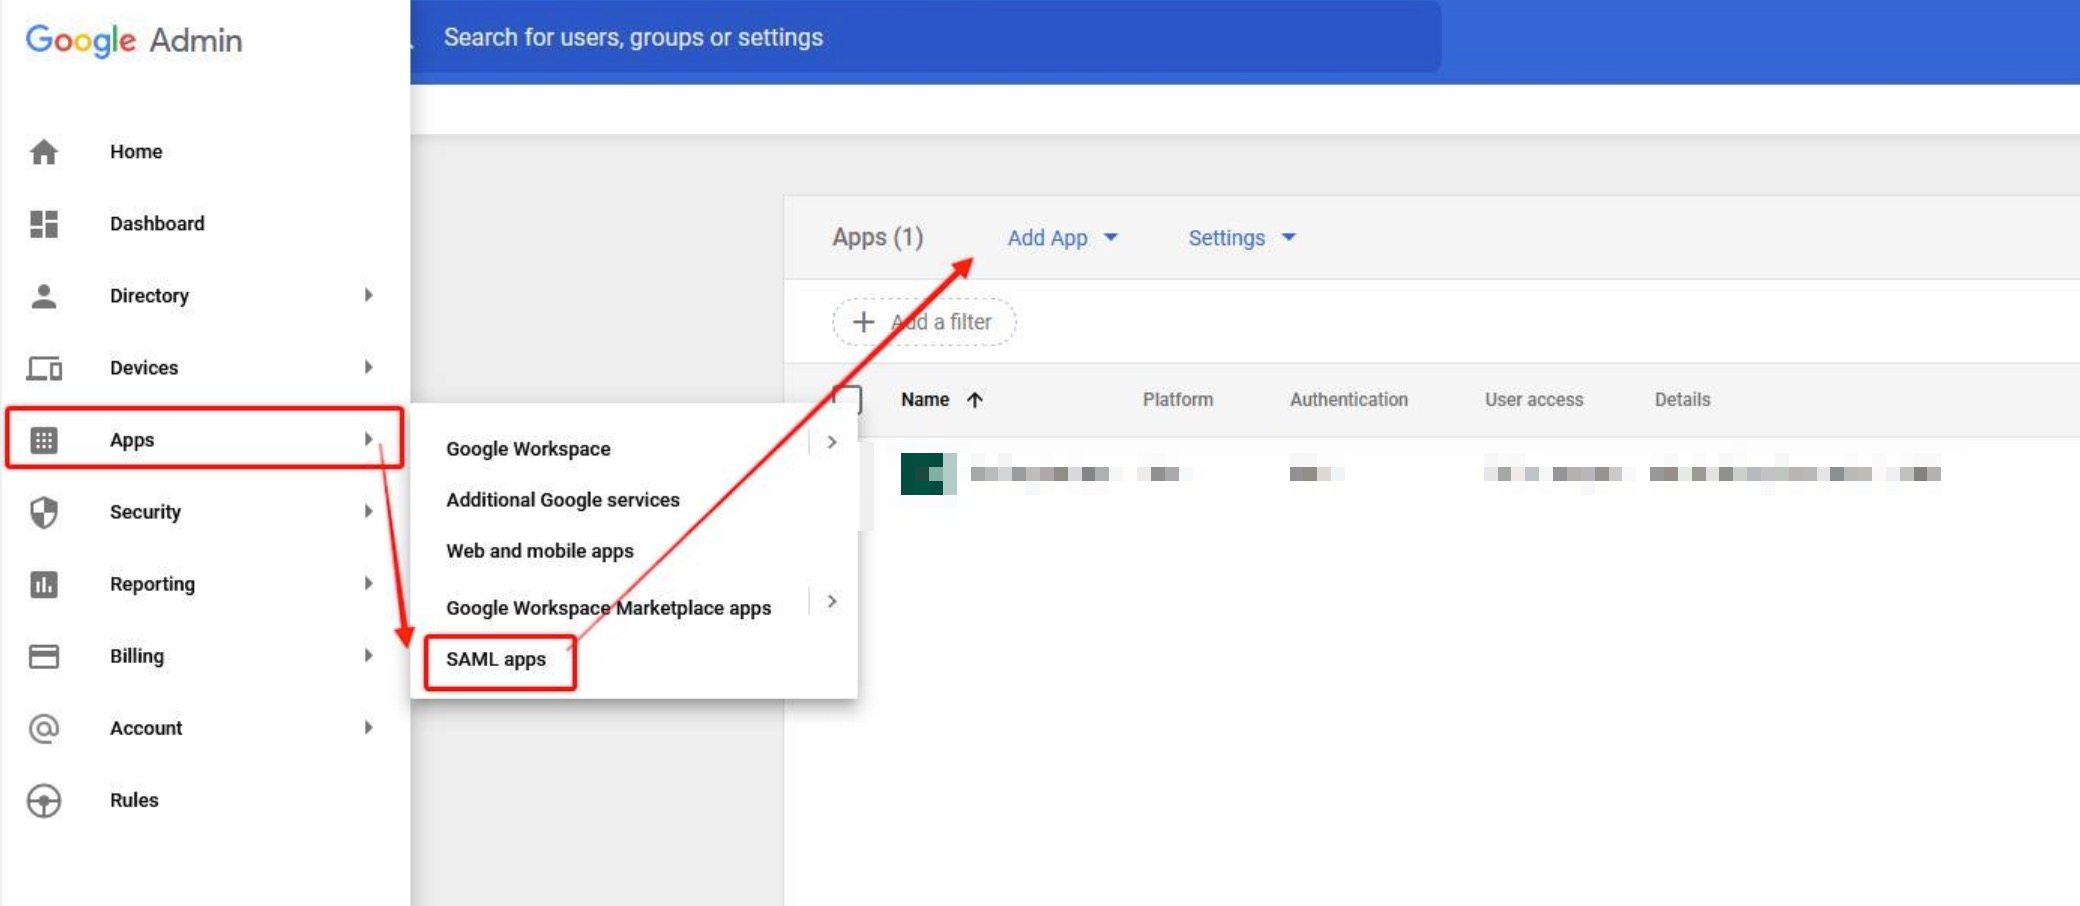
Access Google Admin Panel
Visit https://admin.google.com. Navigate to Apps → SAML apps.
-
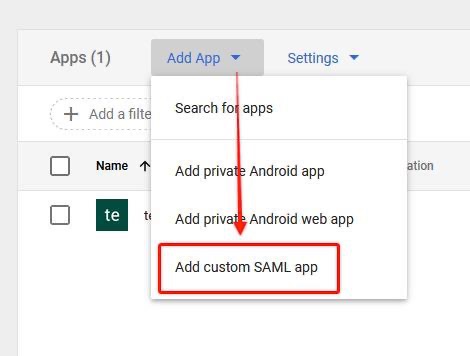
Add a Custom SAML App
Click Add App, then select Add custom SAML App.
-
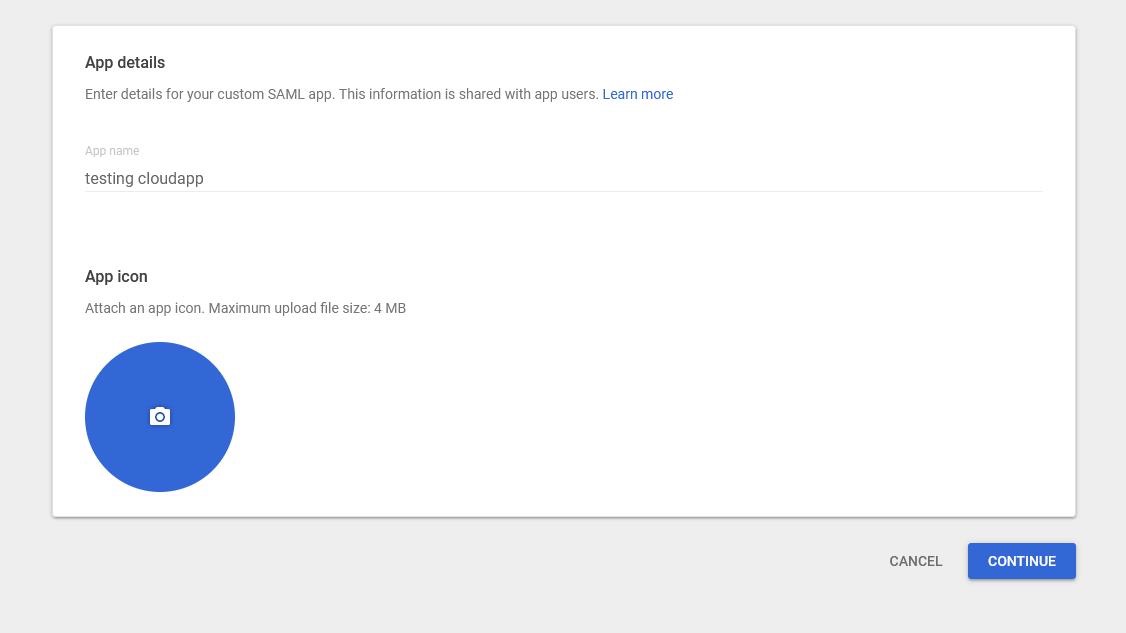
Name Your App
Choose a name for the app, such as "Zight". Optionally, select an app icon.
-
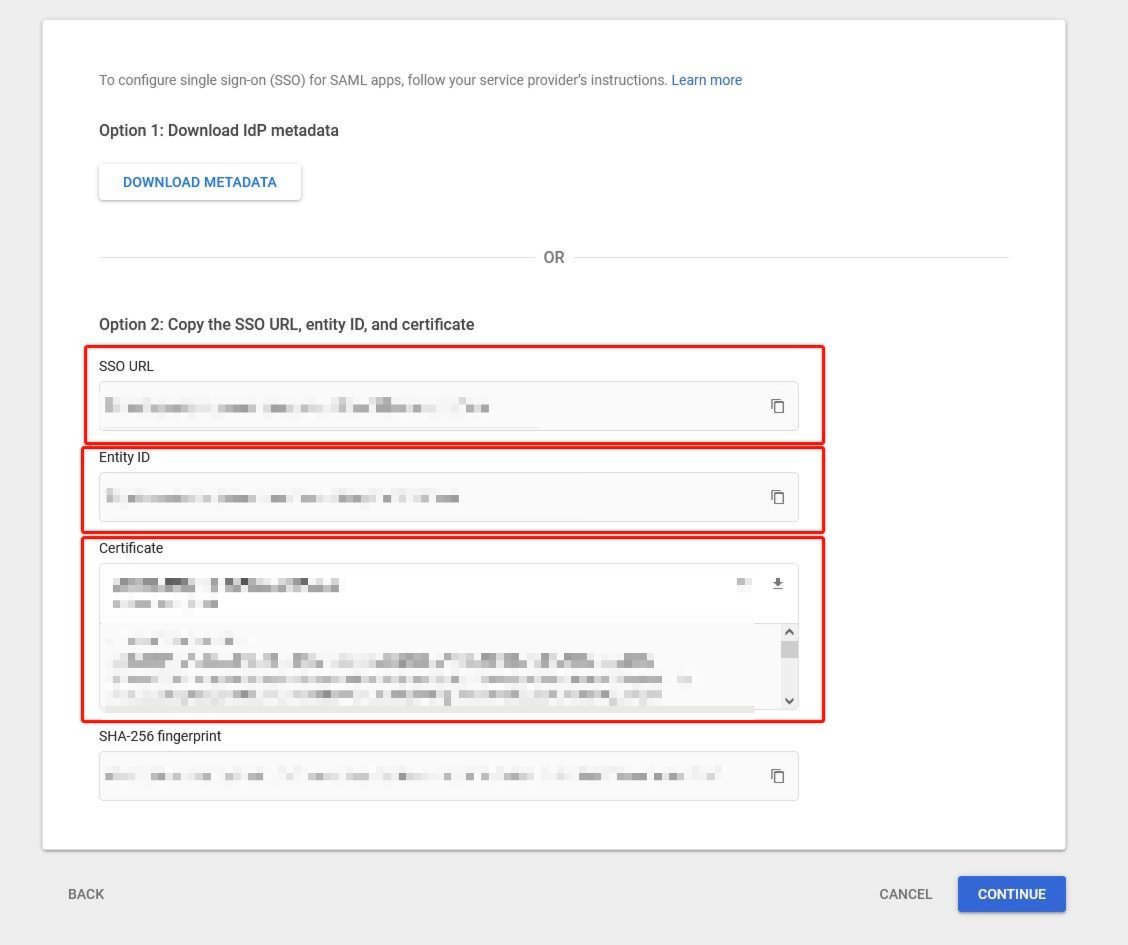
Send SSO Details to Zight
Copy the SSO URL, Entity ID, and Certificate fields. Send these details here or to your Customer Success Manager.
-
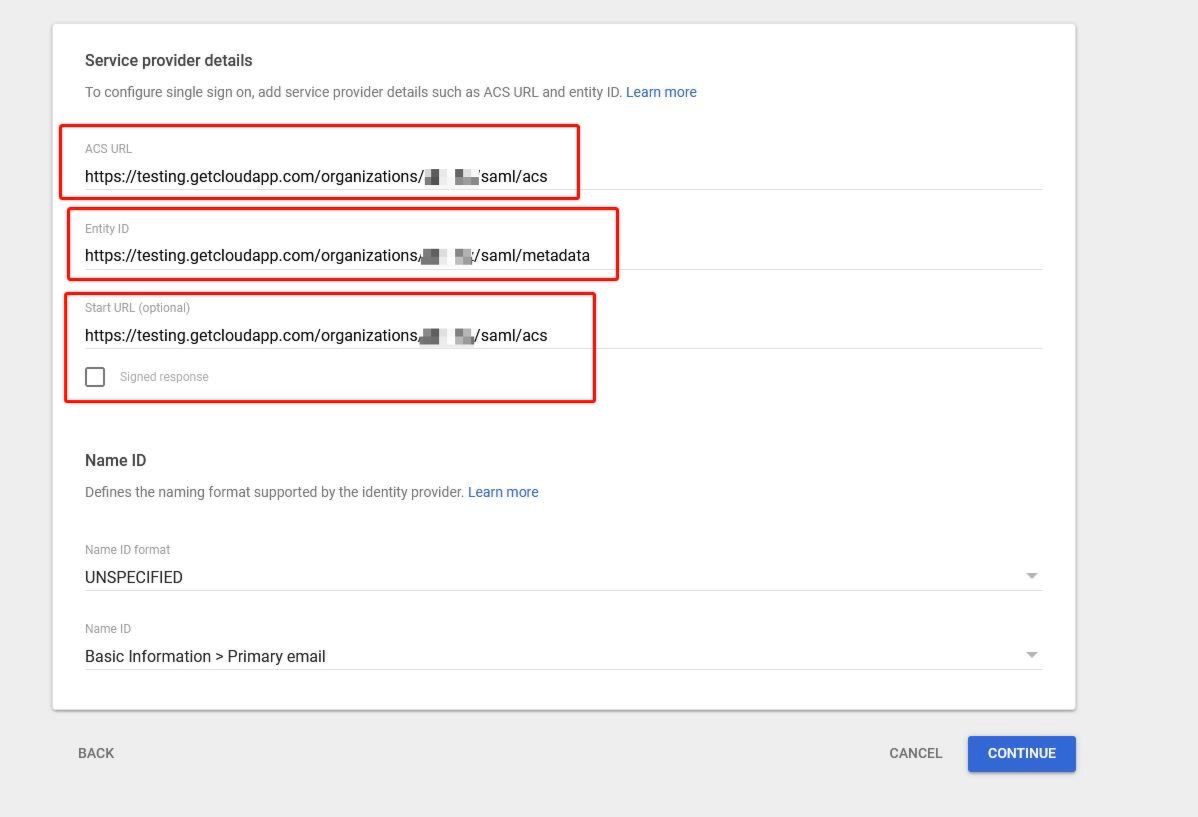
Receive Configuration from Zight
Wait for our team to provide the ACS URL, Entity ID, and Start URL values.
-
Complete Setup
Click Finish to complete the SAML app setup.
-
Configure Zight Dashboard
Access your dashboard within Zight. Navigate to Team settings.
-
Enable SSO
Enable Single Sign-On (SSO) for your organization.
Tips & Best Practices
- Use descriptive app names for easy identification in Google Workspace.
- Regularly update user assignments to maintain security and access control.
- Communicate with your Customer Success Manager for any configuration questions.
Troubleshooting
- New users not provisioning immediately → Allow a few hours for the provisioning to take effect for new users in Google Workspace.
Comments
0 comments
Please sign in to leave a comment.