
Use this guide to connect OneLogin single sign-on (SSO) to Zight and configure SCIM provisioning for your team.
Overview
OneLogin SSO lets your team sign in to Zight through your identity provider. SCIM provisioning helps keep user access in sync after Zight Support completes the required backend setup.
Before you begin
- You need admin access in OneLogin.
- You need permission to configure SAML and SCIM settings for your Zight team.
- Zight Support must validate your SSO details and provide the Zight-specific SCIM token before provisioning can be enabled.
Set up OneLogin SSO and SCIM for Zight
-
Add the SCIM Provisioner app in OneLogin
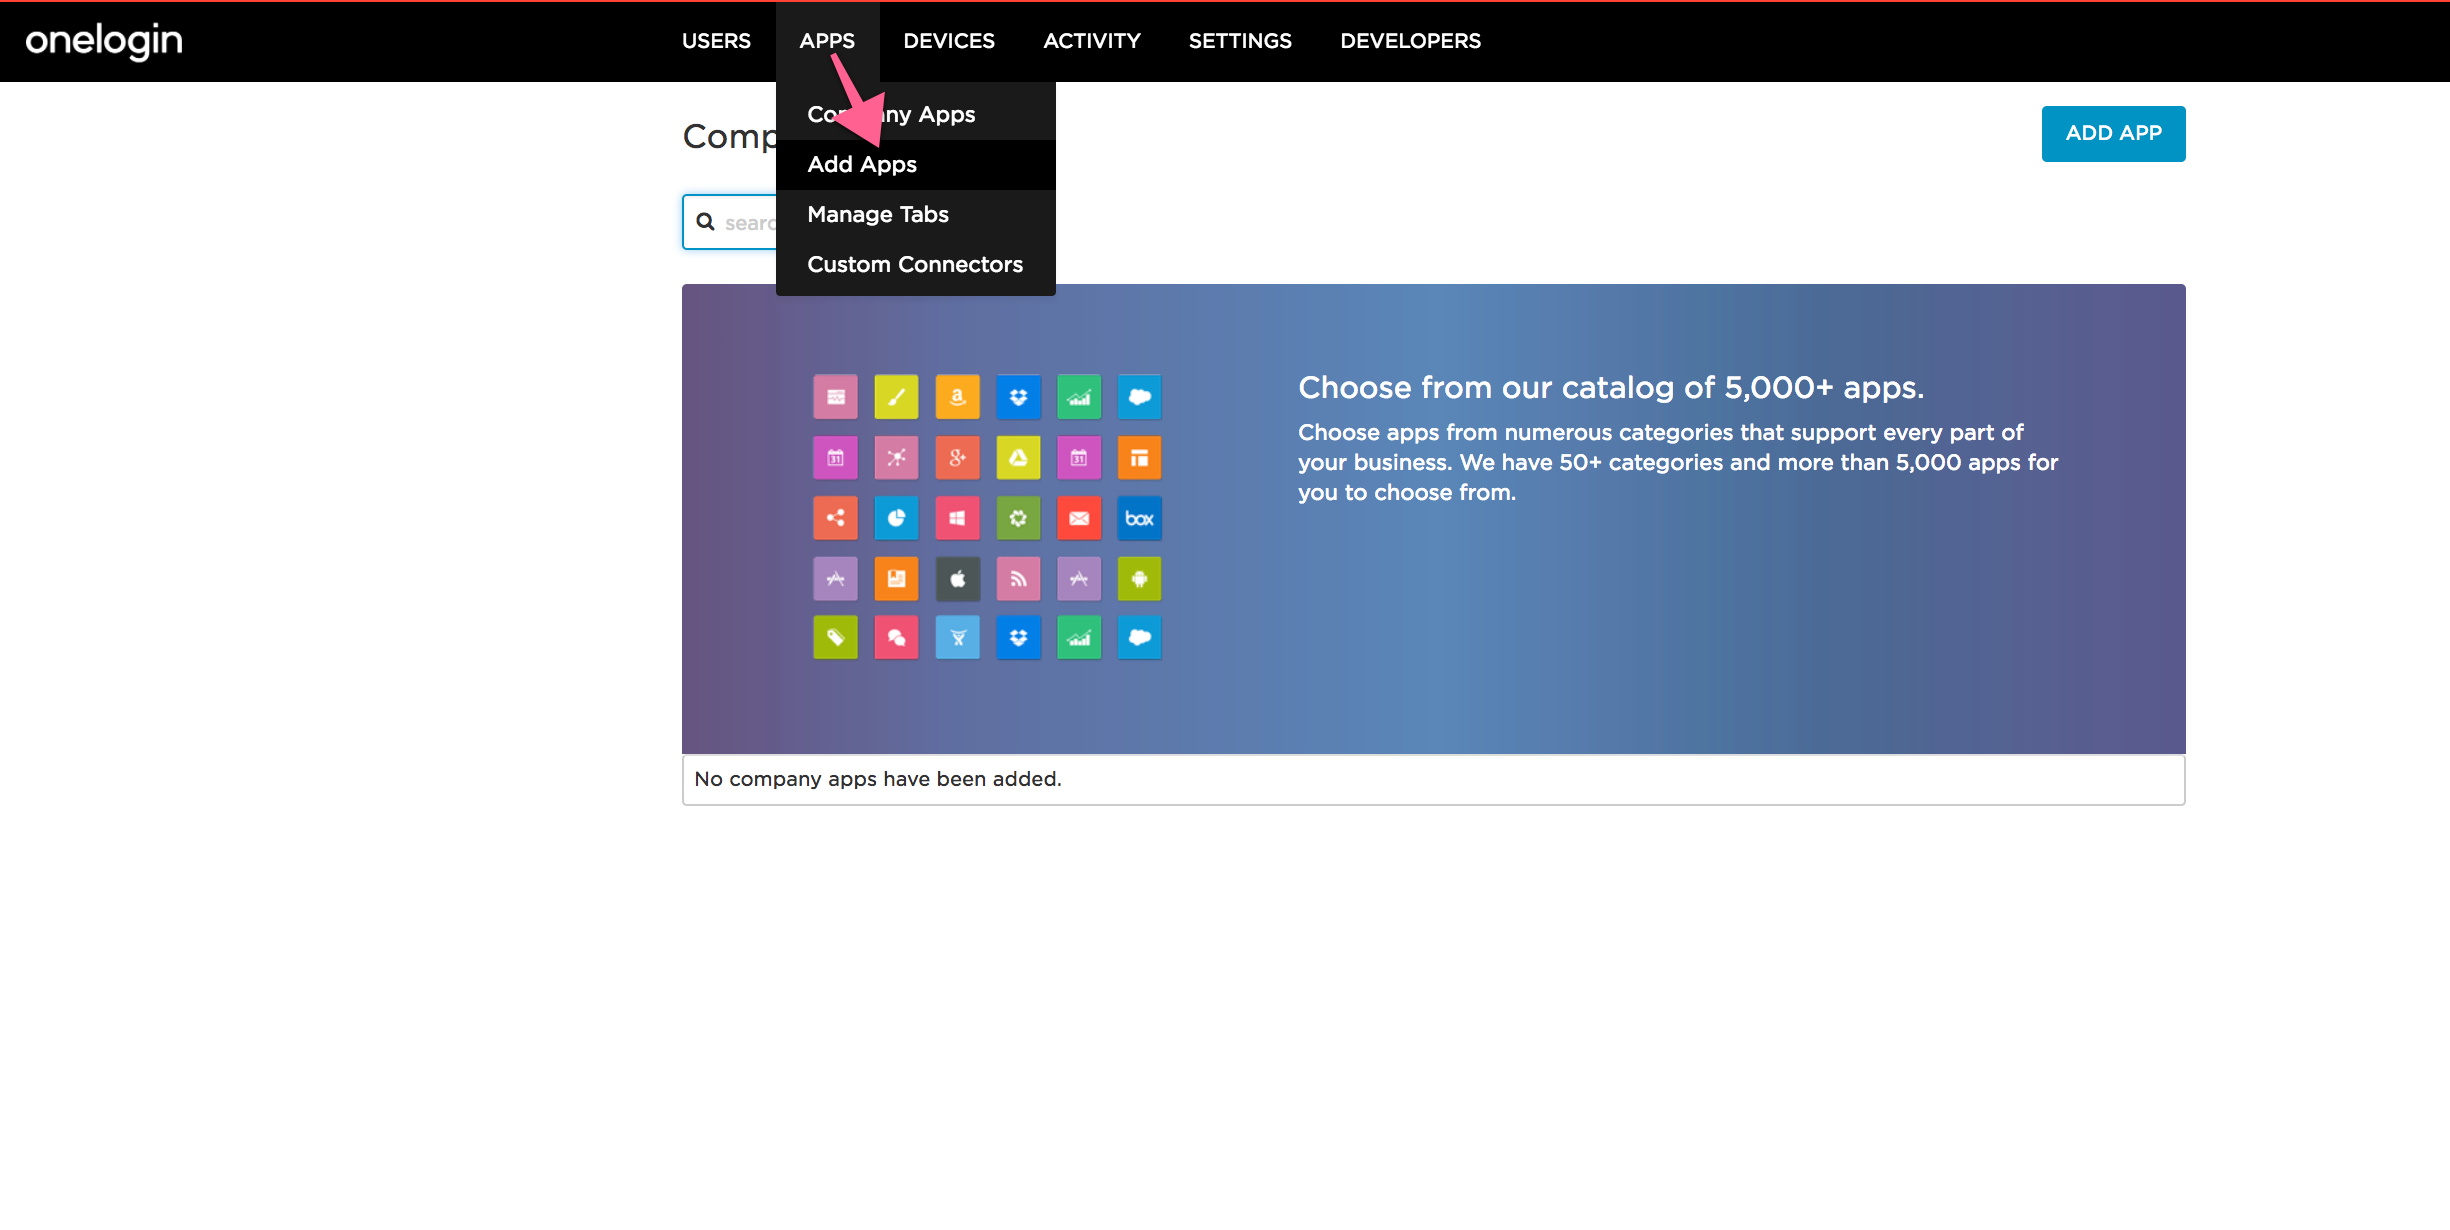
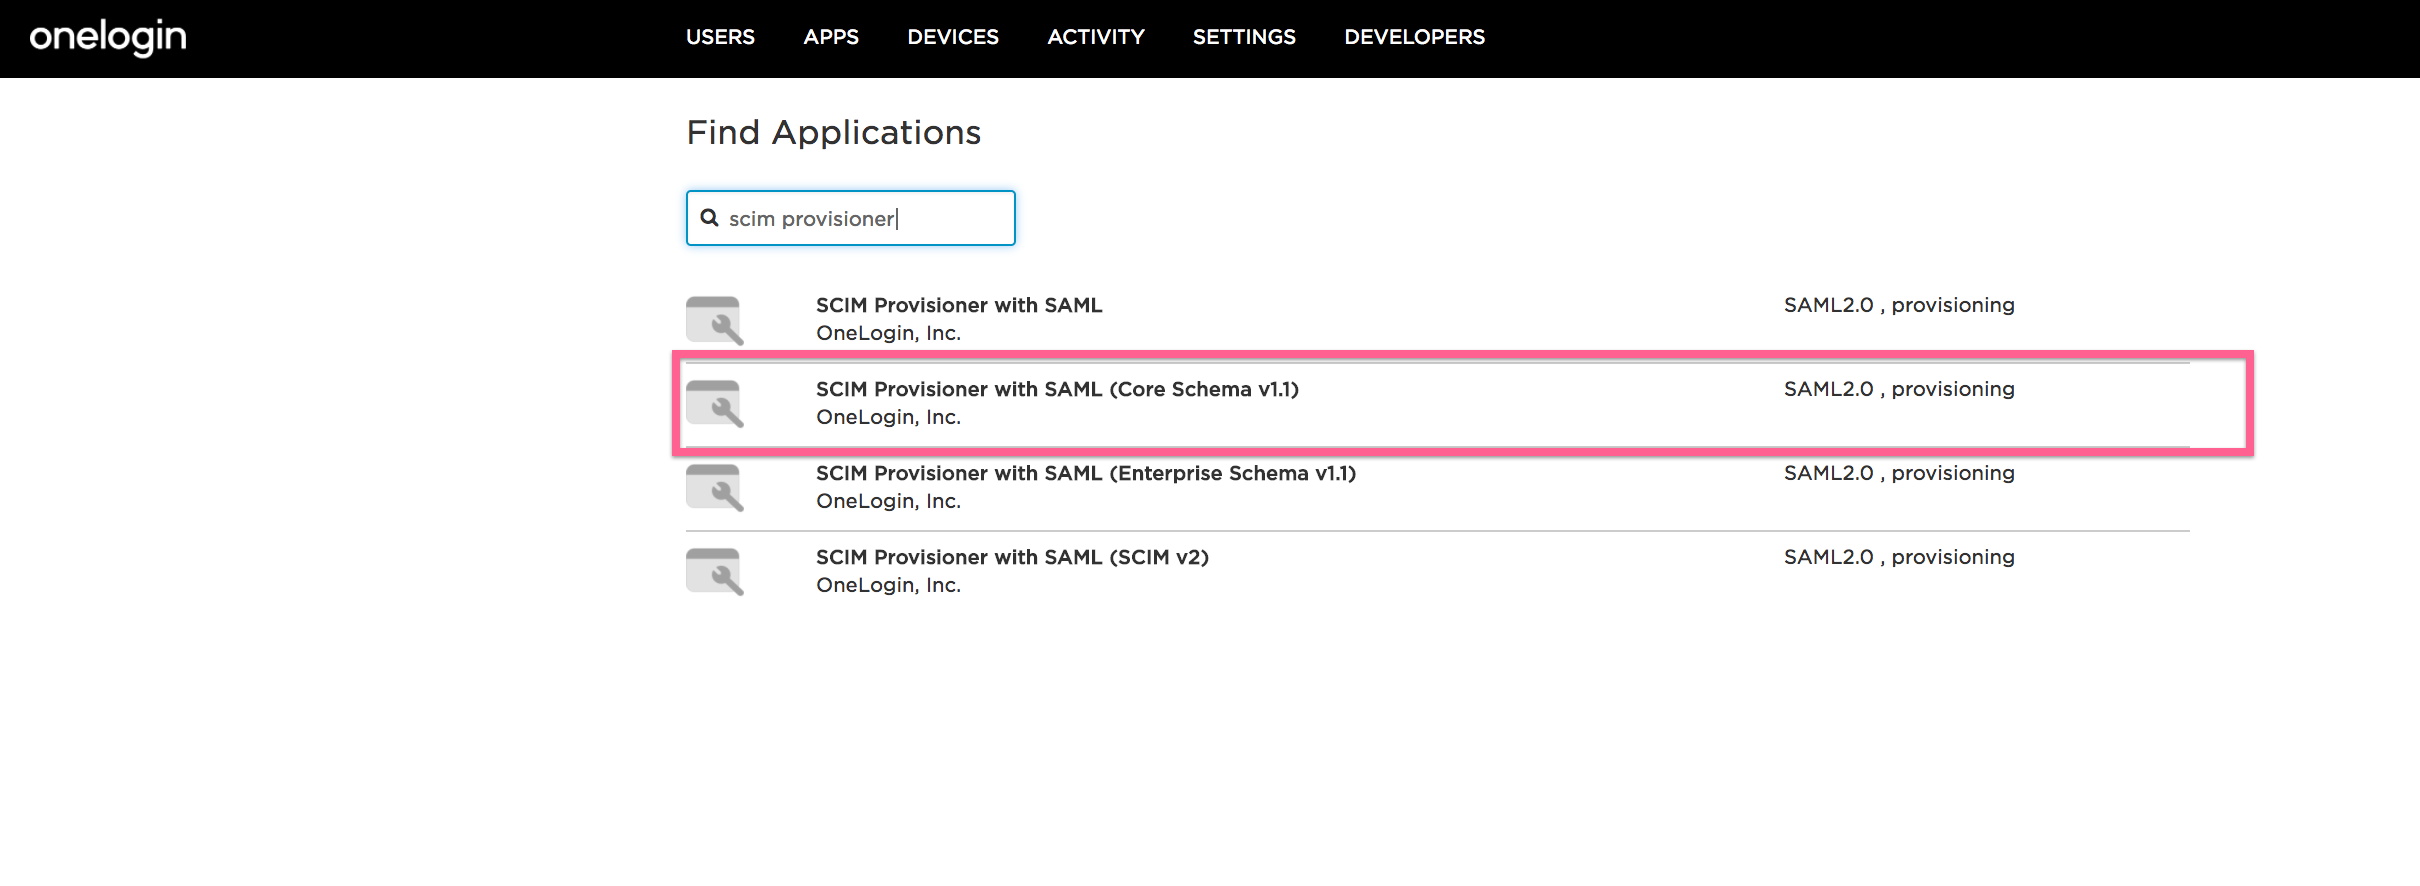
Sign in to OneLogin, go to Apps > Add Apps, add SCIM Provisioner with SAML (Core Schema v1.1), and select Save.
-
Send your SSO details to Zight Support
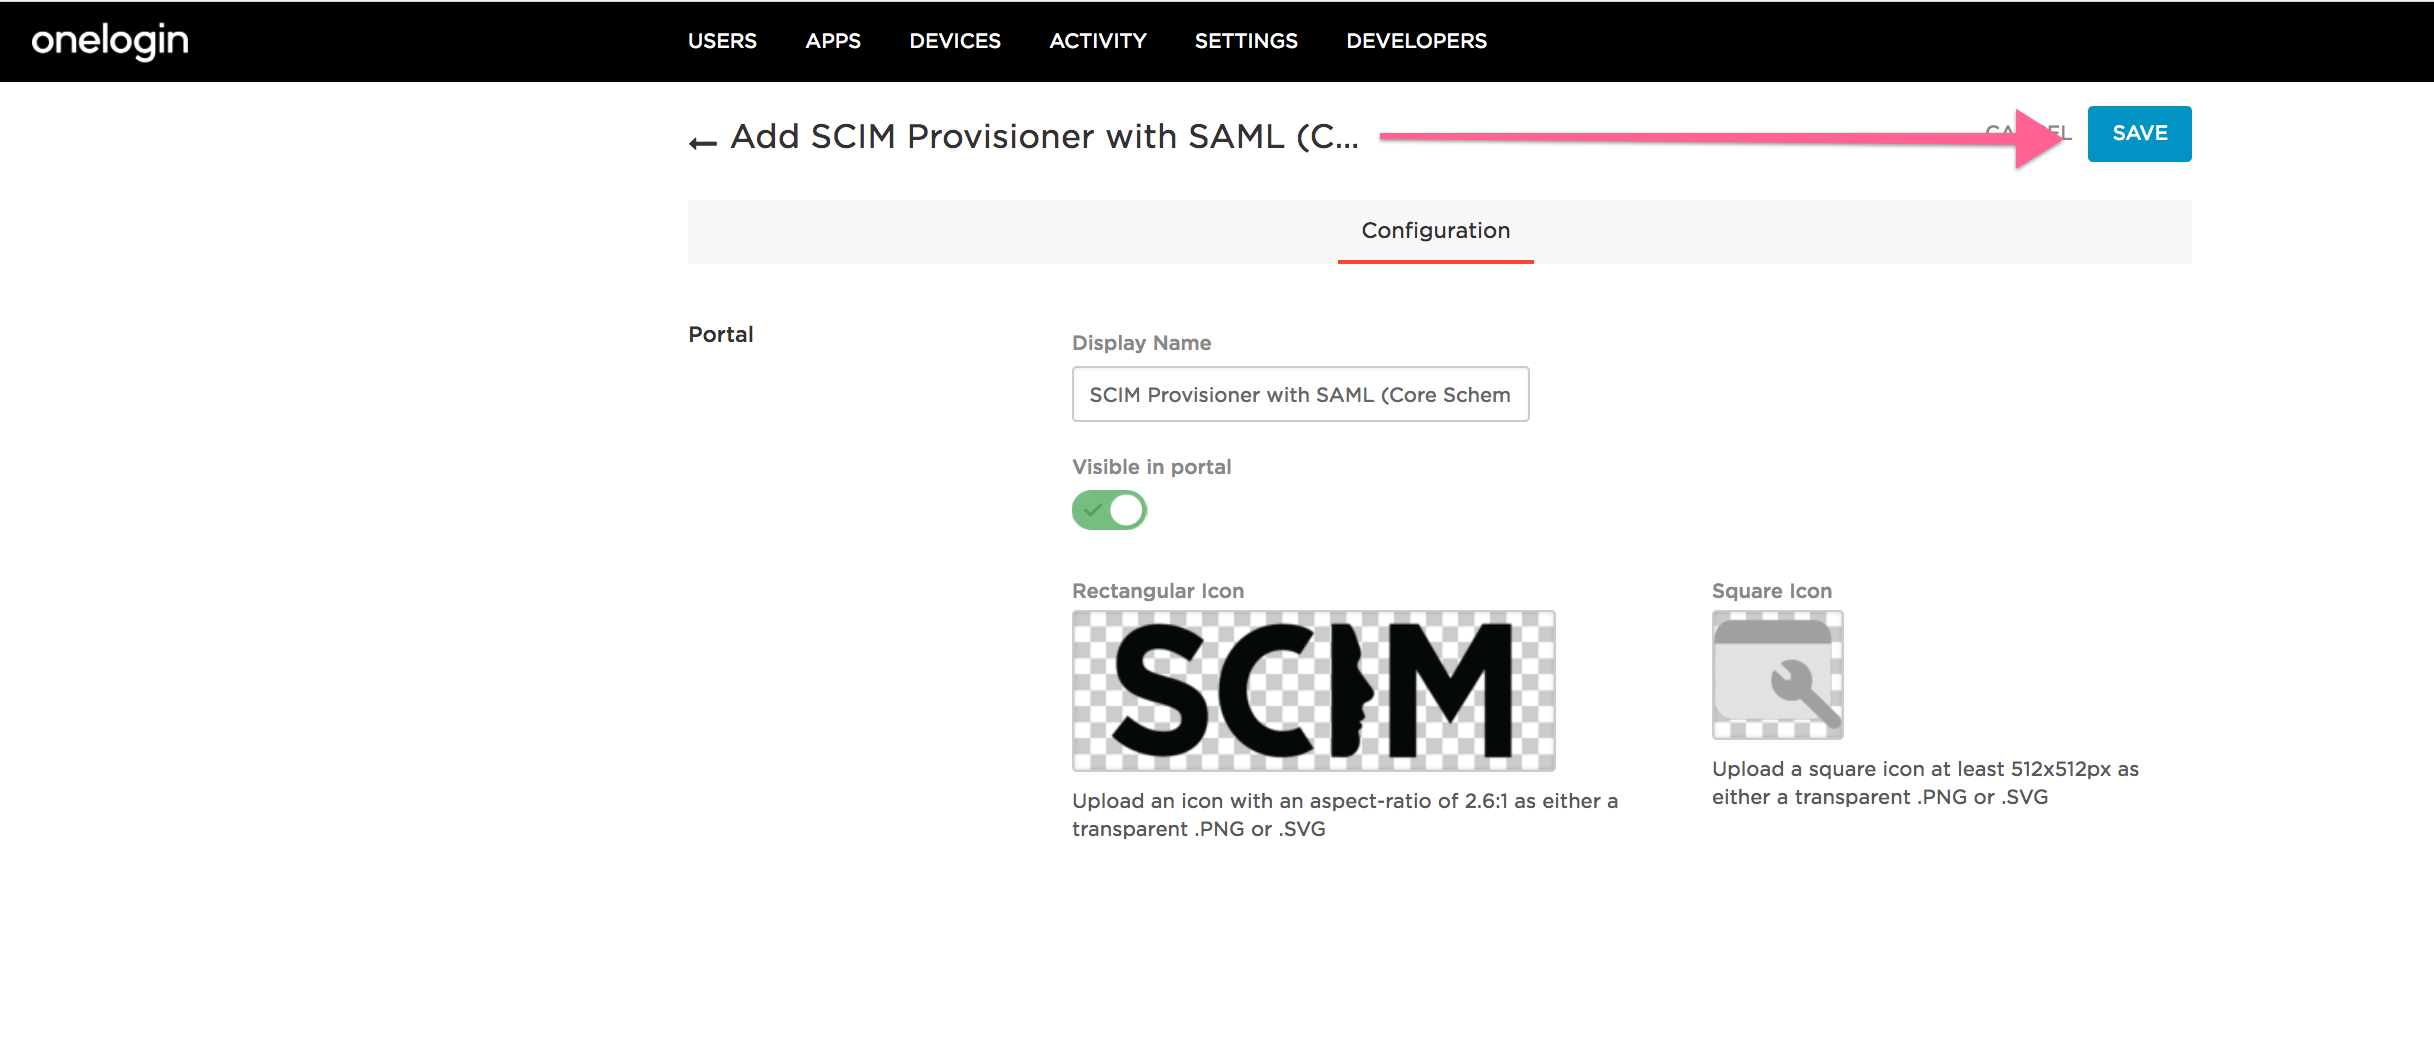
Open the SSO tab in OneLogin and send your X.509 Certificate, SLO URL, and SSO URL to Zight Support. Zight uses these details to validate and configure your app on our side.
-
Add the Zight SAML and SCIM details in OneLogin
After Zight Support completes the backend setup, they will send you the values needed to finish configuration:
- SAML Audience URL
- SAML Consumer URL
-
SCIM Base URL:
https://share.zight.com/saml/scim/v2 - SCIM Bearer Token
-
Add the SCIM JSON template
In OneLogin, add the following SCIM JSON template:
{
  "schemas": [
    "urn:scim:schemas:core:1.0"
  ],
  "email": "{$parameters.scimusername}",
  "details": {
    "first_name": "{$user.lastname}",
    "last_name": "{$user.firstname}"
  }
}
-
Enable API access and save
Enter the SCIM bearer token from Zight Support, change API Status to Enabled, and select Save.
-
Test sign-in
After setup is complete, users can sign in with the SAML 2.0 endpoint in the Zight desktop app or from the OneLogin dashboard.
Troubleshooting
- Need your SCIM bearer token? Contact support@zight.com or your Customer Success Manager.
- SSO is not working yet? Confirm that Zight Support has validated your X.509 Certificate, SLO URL, and SSO URL.
-
Provisioning is not syncing? Confirm that the SCIM Base URL is
https://share.zight.com/saml/scim/v2and that API Status is set to Enabled.
Comments
0 comments
Please sign in to leave a comment.